Blog Update!
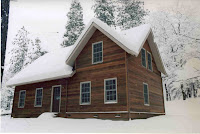
For those of you not following me on Facebook, as of the Summer of 2019 I've moved to Central WA, to a tiny mountain town of less than 1,000 people.

I will be covering my exploits here in the Cascades, as I try to further reduce my impact on the environment. With the same attitude, just at a higher altitude!
Showing posts with label Pioneer Skills. Show all posts

Tuesday, December 20, 2011

Going pioneer in 2012!

I know you are just now hearing about my new book, The Non-Toxic Avenger, and will be hearing a heck of a lot more over the next few months when my blog book tour begins, but I did want to share with you my next book project which I'm actively beavering away on right now.

My next book (tentatively titled, Little House in the Big City: Pioneer Living without the Prairie due out early Fall 2012 from New Society Publishers) is a combination of pioneer living and fun and merriment gleaned from the Laura Ingalls Wilder series of books.

My 8-year-old daughter, Emma, and I are going through the books and reenacting as much as reasonably possible. In other words, we aren't smoking a deer in a stump in the backyard. But we are doing whatever we can. For example, we spent the day yesterday making our own butter with carrots from the backyard to give it a bright yellow color. It turned out better than I thought. This Christmas Eve, we are making an Ingalls-style dinner with various things like dried apple pie, "Injun" bread and beans. So, if it's in the book and doesn't involve something not legal in my area, we're doing it. And, Emma is penciling the illustrations.

This book project doesn't exactly bode well for my bathing habits, but we'll see how that goes. In the meantime, I'm running around trying to find salt pork, pig bladders and tails and making straw hats, rag dolls and other really random, fun, pioneery projects! So, stay tuned!

Are you a fan of the book series, TV series, or just pioneer living?

Saturday, September 24, 2011

Living like Little House on the Prairie

Modern pioneer houseEmulating life in the late 1800s a la Little House on the Prairie is a lesson in conservation and frugality. Life may have been a whole lot tougher back then, but the end result was living life with less impact on the environment.

For modern day pioneers, you get the environmental benefits as well as the money saving ones. And, if your financial portfolio is taking a nosedive, consider trying some 19th century ways of life to snap you back into the black.

1. Grow your own food - Planting your own food crops may take some time to learn how to do properly, but once you get the hang of it, you'll save a ton of money on your food bill. Talk about eating local. For those apartment dwellers out there, you have no excuse. There's a bunch of things you can grow on your windowsills, plus indoor mushroom cultivation and much more.

2. Raise your own critters - Whether it be chickens or other poultry for their eggs and meat, bees for honey, rabbits for meat and fur or goats for dairy, wool and meat, many people have plenty of options for animal husbandry.

3. Make your meals from scratch - Do you think Ma bought dinner at the local fast food joint? I reckon not. Spending the extra effort making your meals from scratch will not only save you money, but will also save your arteries from the salt, fat and cholesterol laden convenience foods we tend to rely on. Take it one step further and make your own yogurt, cereal, butter, tomato sauce, jams, peanut butter, bread, pasta... the list goes on.

4. Conserve water - Indoor plumbing is a thing of the future and thinking like a pioneer will save you water. If you had to rely on all your daily water by lugging it to the house from the creek, you'd use a heckuva lot less water. So, save your warm up water from the sink and showers for other needs (like flushing the toilet) and be mindful of that running tap water.

5. Skip the heat - I know not all of you can do this, but even just turning your thermostats down lower, bundling up in sweaters, slippers and blankets will save you tons of money on your winter heating costs. Since the cost of heating oil, electricity and gas are expected to increase at least 10% this winter, think about reducing your thermostats by 10% or more to offset the increase.

6. Turn off the lights - Concentrate your activities in one main room if possible to reduce the number of lights on in the house. Does your whole family really need one light on (or more) per person? Getting together may also inspire more family interaction. Try telling stories - you'll be surprised at how interested your kids, friends and family are about your childhood. And all that huddling together will reduce your heating costs.

7. Walk instead of drive - Since most of you don't own a team of horses, walking is your best bet for getting around. Even if you don't live near town, most pioneers didn't either, and walking several miles to town was considered routine. You'll save money on gas and get the extra exercise you probably need.

8. Rise and set with the sun - Getting up early and going to bed early will not only award you with the much needed sleep that most of us don't get, but it will also save you money on your electricity and heating bills.

9. Craft your own - Sewing, knitting, quilting, soap-making, wood-working and other crafts are not only great hobbies, but are rewarding and can save you money. Plus, you can give away your hard work as gifts that will be much better appreciated than many store bought items.

10. Don't buy on credit - As Pa would say, "cash on the barrel head only"! In other words, live within your means and you will not run into financial trouble. By the same token, if you are only spending what you have you'll be less likely to be caught up in wanton consumerism and all the environmental impact it entails. So, stick to buying quality products that you absolutely need and that fit within your budget.

I don't know about you but I'm feeling another Pioneer Week coming on!

Tuesday, February 2, 2010

Pioneer Skills: make a rag rug

There is all sorts of information online regarding how to braid a rag rug, so I've distilled down the easiest way of making one in, hopefully, an easy to understand set of instructions.

The instructions that follow are for making a braided rug using three strands. If you know how to braid using 4 or more strands, by all means, go to town. You would just need to create that many long strands for your project.

A quick note about the width of the strips: if you are using heavier fabric, you'll want a thinner width (close to 1" wide); if you are using a thinner fabric (like old t-shirts), a width of 3" will be more ideal. Just be consistent and keep the same width throughout, unless you want a lumpy rug.

Equipment:
Strips of rags cut into 2" wide lengths (the longer the better)
Sturdy thread (quilting or carpet thread is ideal)
Thick needle or curved upholstery needle

Prepare the Strips
There are several methods to joining the strips of rags together. You can sew them together (on the diagonal) or you can knot them together. Basically what you want to achieve is three very long strips of cloth. If you knot them, the knots may be visible in the rug, so if you are using thicker cloth, sewing may be the way to go.

The longer your three strips end up being, the larger the rug. But you can always clip your work and sew more strips on later if braiding with really long pieces is driving you nuts. Anything over 8 or 9 feet is difficult to braid. So, add on as you go.

Get Braiding
To start, sew or knot the three strips together. You can attach the start to something heavy or have someone hold the end for you while you braid. This can be fun for kids since they get to help out and watch the process while they are at it. Once you've braided far enough down where it doesn't twist, you won't need your helper. When you reach the end of your braid, sew or knot the loose ends together.

Sew it Up
Coil your braided rope on the floor, starting at the center for a circle. If you prefer an oval shape, start with one foot length and coil around that. As you coil (or when you are done if you want to check the shape), sew the rows of coil to each other, lacing them as shown in the picture on the right. When the coils are secured tightly, fasten off.

A small or medium size rug is ideal, because you can clean it in a washing machine without too much of an issue. I'm planning on making some bath rugs for the kids with a bag of old clothes!

If you are a more visual person, here's a video instruction of basically the same method:


Resources:
Braided rug making instructions
Rugmaker's Homestead
A brief history of rag rugs
How to make a flat braided rug

Wednesday, January 27, 2010

Pioneer Skills: making ink from berries

Want to find out how to make your own ink using some basic, commonly found ingredients? You won't be able to refill your ballpoint or fountain pens with this ink, but find yourself a good quill pen and you'll be on your way. This makes for a great project to do with the kids.

Writing with a quill pen gives your handwriting an antiqued look, so it's great to use for invitations, art projects or for keepsakes. If you're real serious, you can also invest in a dipping pen, but the ink you make will need to be a little thicker. You can make your own quill pen from feathers by following these instructions or watching this video.

Most pioneers couldn't afford to buy ink, since true ink was fairly expensive, so they made their own using different ingredients depending on what color ink they needed. Some pioneers used not just berries, but powdered roots and nuts as well to create their ink. You can made different colored inks depending on which berry you use.

Ingredients:
1/2 cup ripe berries (blueberries, cherries, blackberries, strawberries, elderberries, raspberries are good choices)
1/2 teaspoon vinegar
1/2 teaspoon salt

Directions:
1. Place berries in a strainer and hold it over a bowl.

2. Crush the berries against the strainer so that the berry juice strains into the bowl.

3. Once all your berries are crushed and you are left with just pulp (to put in compost or use for something else!), add the vinegar and salt to the juice. The vinegar helps the ink retain its color and the salt prevents molding.

4. If the berry ink is too thick, thin it with water, adding a little at a time to get it to desired consistency.

5. Store in a baby food jar or a small canning jar and keep refrigerated.

Resources:
Quill Thrill: Recipes for Homemade Ink
Recipes for Quill Pen Ink
Homemade Ink from Berries

Tuesday, January 19, 2010

Pioneer Skills: hand dipped beeswax candles

Lighting with pure beeswax candles made with cotton wicks was one of the many methods of lighting during pioneer times and, I'm sure, the least air-polluting. Burning beeswax has been claimed to clean the air in your home by ionizing it. I make no such grandiose claims, just that beeswax candles smell great and burn cleanly.

Interest in beekeeping, even in urban areas, is on the rise so even if you don't raise your own, you should have access to a local source of beeswax through your farmers market. If you can't find any there, check online resources for beeswax and try to select an organic source.

I chose to explain how to make hand dipped beeswax candles, mostly because the amount of equipment you need is minimal. You don't need molds or any fancy wick suspension system or the like. Just a container of melted beeswax and some wicks.

I suspect this was also the main method of making candles back in pioneer days because of its simplicity. It would also be one of those projects that took time and could be done as a social event. I envision women sitting around the beeswax, making candles and talking. I suggest you host a beeswax candle making party to keep the tradition alive.

This also makes a good project for kids, as long as they are old enough to be careful around hot wax.

Supply list
  • Beeswax (get organic beeswax from a local beekeeper if you can)
  • 100% cotton candle wicks (organic cotton if you can)
  • Metal container (to melt the beeswax, you can use a medium, tall tin can for this)
  • Pot

    Instructions:

    1. Fill the metal container about 3/4 full of beeswax. If you don't feel like chopping up large chunks of beeswax, which is, notably, a huge pain, you can use beeswax pellets if you can find them, but they are much more expensive than buying bulk beeswax. Place your metal container in a pot of water so that it hits about halfway up the container. Heat the water over medium heat until the wax is melted and turn the heat down to simmer.

    2. Trim the wicks into 16 inch pieces. Dip each end of the wick about 6" into the wax, alternately ends, about a second in and a second to pull out. Wait 15 seconds in between dips for the previous "layer" to cool. Once you get the hang of it, you'll get into a candle dipping rhythm that can be quite meditative.

    3. When your candle has reached the appropriate diameter (1/2 to 1 inch), it's time to cool them. If your candles are looking a tad too rustic for your tastes, you can roll them in wax paper on a hard surface for a smoother finish. Let them cool by hanging them over a thick rod. Trim the bottom of the candle if you like.

    Problem solving:
    *If you are finding the the wick is floating in the wax during the first few dips, you can tie some washers or other weight to the dipping end.
    *If you want to speed things up a bit, you can dip the candles into cool water in between dips.
    *If you are having issues with clumpy wax or remelting your candle as you are dipping, keep the temperature around 160 degrees F. 150 to 180 is a safe range for dipping.
    *For a clean finish, increase the temperature of the wax to 180 degrees for the last dip.

    References:
    How to make hand dipped beeswax candles
    Making hand dipped candles
  • Monday, January 11, 2010

    Pioneer Skills: lemon verbena perfume

    For those of you who are fans of Little House on the Prairie, you'll know that Laura was totally fascinated by the fact that her teacher, Miss Beadle, wore lemon verbena perfume. If you were a fan of the show, Mr. Edwards gave Laura lemon verbena perfume in two episodes. So, what better thing to learn as a pioneer skill than how to make your own lemon verbena perfume?

    The Spanish first brought lemon verbena to Europe, where it was used widely in perfume in the 18th century. Today, even though the herb lemon verbena can be used in teas and savory dishes, it is still a fragrance widely used in perfumes. Lemon verbena has a woodsy scent, which helps add spiciness to many fragrances. And, because of the woodsy smell, lemon verbena in cologne makes a great scent for men as well as women.

    Start with 100-proof vodka as a carrier for your perfume. The vodka is almost completely odorless and evaporates quickly when used on the skin, leaving behind just the fragrance. Combine about 24 drops of lemon verbena essential oil with two teaspoons of distilled water and two teaspoons of vodka. Pour all ingredients into a dark glass bottle and let them steep for at least 48 hours. Shake the bottle occasionally to mix the scent.

    In the book "Gone with the Wind," lemon verbena was one of Scarlett O'Hara's mother's favorite scents. During that era, people made lemon verbena lavender perfume using pure essential oils. Lemon verbena lavender perfume makes a great combination since the lavender provides a relaxing scent while lemon verbena is refreshing. Bergamot acts as a refreshing top note. Start with 1/4 cup vodka and add 1/2 teaspoon lemon verbena oil, 5 drops of lavender essential oil and 5 drops of bergamot essential oil. Store and mix as above.

    Sunday, January 3, 2010

    Pioneer Skills: make your own butter

    If you've been reading this blog for very long, you'll know that I have a slight fixation with pioneer living. Probably because there's a lot of cross-over between pioneer living and self-sufficiency and homesteading.

    Last year (well, actually November 2008) I hosted a Pioneer Week, to encourage people to try living a little more simply by observing some basic living skills like making all your meals from scratch, drastically reducing your energy and water consumption, limiting your transportation, keeping your entertainment very basic and purchasing only necessities. For a full list of "rules" you can check out this post.

    If any of you are interested in having me host this again, I'd be happy to. We didn't have a huge amount of participation last time, but I know those that did it really enjoyed it. It may make sense to wait until a little later in the year to do a Pioneer Week again, when weather and daylight are a little more agreeable.

    Anyway, in the meantime, I was planning on posting some basic ideas and how-to's of things that are lost on most of us. I grew up in suburbia and learned limited (okay, nothing) about how to survive on my own without store bought everything. I've managed to teach myself quite a few things in my adulthood, but there's still plenty more to learn (see yesterday's Skills to Learn in 2010 post for ideas).

    These "Pioneer Skills" posts will be simple, short and sweet. Here is one oldie but goody to get you started...

    How to Make Your Own Butter

    For full instructions including step-by-step pictures, see this post.

    If you haven't tried this one yet, then you really need to give it a go. The taste difference from regular store bought butter is definitely worth the extra effort. You can use the leftover "buttermilk" as a milk substitute in cooking, just know that it is fairly low-fat.

    If you thought that you couldn't make butter by hand without a churn or some sort of fancy equipment, then I'm here to tell you that all you need is a little heavy whipping cream, a Mason jar and lid and two hands. It will take you about 30 minutes.

    Let the shaking begin!

    1. Collect all the necessary equipment. I highly recommend trying to find local, organic cream as the quality is much better, but you can use whatever you have on hand if need be. I generally use a pint of heavy whipping cream and a quart canning jar with lid.

    2. Leave the cream out on the counter for a while (the longer the cream sours, the less sweet the butter will be). Once the cream is warmed up to about 60 degrees then pour it into the Mason jar.

    3. Put on the lid and start shaking it. After about two minutes you'll see a nice lightly whipped cream.

    4. After about four minutes it will look like thick, whipped cream. Resist the temptation to empty the entire Mason jar into you mouth at this point. But do crack it open and breathe in the heavenly, sweet scent.

    5. After about nine minutes of shaking, the cream will start to separate from the sides of the glass. Feel free to take a break.

    6. After about fourteen minutes, the whey starts separating from the butter.

    7. After about sixteen minutes, the curd is more noticeable and there's a lot more whey.

    8. At this point you can start pouring the buttermilk off. Continue shaking for a few minutes until your butter has solidified a bit more and until you aren't getting anymore buttermilk off of it.

    9. Pour out the butter into a bowl. Pour cold water over the butter and start "massaging" the butter with a spatula to rinse the rest of the buttermilk out. Continue replacing the water until the water stays clear. Drain.

    10. Mold your butter into butter molds or into ramekins (or store in an old food safe plastic container). You will also end up with a scant cup of buttermilk (depending on how "juicy" your cream is).

    Voila! Butter. In less than thirty minutes.

    [This can also be done using a standing mixture, just be careful to stop it when the butter separates from the buttermilk or you will remix it and it won't separate again.]